About Sarah Radmer

I am a journalism and public relations major at the University of Washington. I would like to pursue a career in journalism to tell the stories of individuals that are often left out of the mainstream media.

Hand painted fabric DIY

After going to the Creative-U event this past Saturday I was dying to paint something myself. (More on the fabric dyeing event here.)

Because I am on a budget I decided to use a stencil, fabric, and spray adhesive that I already had. I also took Chris’s advice and used cosmetic sponges instead of a paint brush.

The stencil I used is this Moroccan pattern that I purchased at Hobby Lobby this summer for another project. Unfortunately Seattle doesn’t have a Hobby Lobby but you can buy it online here.

I went to Artist & Craftsman, a craft store in the U-district to buy the fabric paint. They had a pretty good selection and I settled on these two colors.

I then tested out different pattern ideas on some scraps of my fabric before I settled on the simplest design (on the right).

This big ugly piece of cardboard is probably one of my best DIY tricks. Because I live in an apartment and have no access to outdoor areas to paint, it’s really useful to have a big surface to paint on.

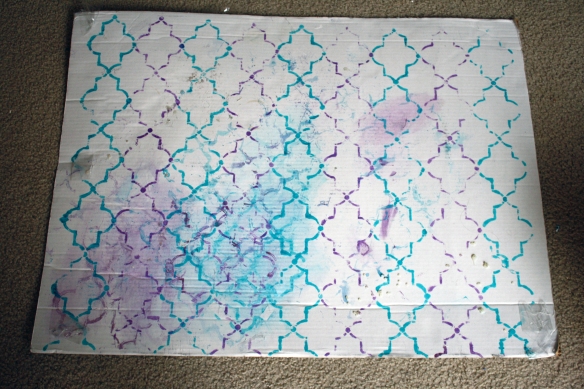
That way, when you’re fabric inevitably bleeds, it’s your cardboard and not your fabric that looks like this.

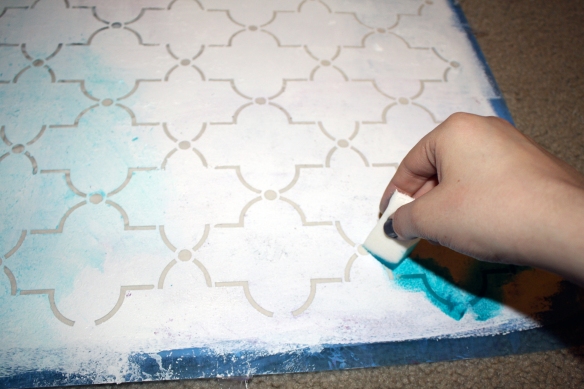
Two things were really key with this project. The first was using a spray adhesive to keep your stencil in place. You can really tell where I was diligent with it and where I wasn’t. The second thing was using the cosmetic sponge. They were super inexpensive and allowed you to dab on the paint without having too much excess.

Once I finished, I left the fabric to dry for 24-hours. Then it was time to iron the fabric to set the dye.

There are some problem areas when you look closely. (This is why the adhesive is so important.)

But overall, I’m really happy with how it turned out.

As far as budget, I spent $10 on the fabric paint and $3 on the sponges but I hardly made a dent in either of them.

I have big plans for this fabric. Tune in next week to see what I do with it.

Have you painted fabric? How did it turn out? Let me know in the comments below.

Fabric dyeing | Learning from the experts

This afternoon, I sat in on Pacific Fabric’s monthly Creative-U event hosted by company spokesperson Chris Groce.

The session lasted just-under an hour and covered new techniques in fabric dyeing, the products available at Pacific Fabric, and also some new trends in quilting. The event was free and attendance was rewarded with a 20 percent off coupon for any of the products covered in the seminar.

Groce spoke about a variety of products and new dyeing techniques that could be used in quilting. But a lot of them would be great from home DIY too.

Look at that tree stencil painted onto the fabric. That is just begging to become a throw pillow or tote bag.

The key takeaway for budget-DIYers is that it’s easy to make your own hand-dyed fabrics for a fraction of what they would cost from a retailer.

For students on a budget, it’s a good way to try before you buy.

“It’s a good place to find something you’d really like (to try out),” she said. “It’s really about education, even employees come and listen.”

Groce hosts these seminars once a month. November’s session will be on fast and fabulous holiday decor and December’s will cover last-minute Christmas gifts.

Pacific Fabrics is near Northgate mall and is about a 25-minute bus ride.

Listen to a news-podcast I did about Groce’s events here: 

Welcome to Rainy Day DIY

Hello fellow DIY lovers,

I have thought about and put off creating a DIY blog for the longest time. Growing up, a lot of the furniture in my house was made by my dad and my parents did a lot of home repairs themselves. I must have inherited that gene too, because I love creating things by hand for my house. I think I was the only 13-year-old who had an entire design inspiration folder when it came time to remodel my childhood bedroom (and strip it of its fantastic ’70s floral wallpaper).

Since moving to the rainy city of Seattle to attend college at the University of Washington, I have lived in both a house and an apartment. And while I wanted to decorate and make those places feel like home, I was working on a college budget with renter’s restrictions. But I am constantly searching for bargains and coming up with ways to make things mine, without changing too much in my rented home. So hopefully, I can share some tips and tricks that students in the U-District and all DIY-lovers can put to use.

See you soon!

-Sarah

Make more counter-space with an IKEA hack

When I first moved to Seattle, I moved into a house built in 1907 that I’m pretty sure was never updated since then. Needless to say, we had counter-space problems. As in, “seriously, where is the counter?” space problems.

So my roommates and I decided to hunt for some options that we could make ourselves to add some counter-space for as little money as possible. We stumbled upon this idea. And decided to go for it.

And when I moved to my new apartment, I made it again and added the hardware. Now, we use it as a “we-have-no-where-else-to-put-our-microwave” microwave stand.

Here’s how I did it. First you need two IKEA Lack tables. These bad boys are awesome and only $8. I used one I had left over and a new one for the bottom. The first hack I made, we used double stick tape to connect the legs of the top table to the bottom table. The second time I used a hot glue gun. I’d definitely recommend going the tape route, because the hot glue can make things uneven.

The table I used on top was damaged, but that didn’t matter because I covered it with a cutting board my dad made me. If you don’t have a handy-dandy dad to make you one, I wouldn’t recommend buying one because they are pricey. Instead, I’d try paper in a cool print and then cover it with contact paper. The U-District book store has some cool, large printed paper and contact paper can be found at target or craft stores. (Bonus: if you use contact paper, it will be easy to wipe off if you spill on it.) One extra thing I added to my microwave stand was a Bygel bar in front to hang dish towels from.

Getting to IKEA from the U-District is possible by bus and free for us Huskies with the U-Pass. But keep in mind you have to haul home everything you buy, so I’d advise begging finding a friend with a car and making the trip that way.

The best thing about this project is the price. Here’s a budget breakdown for you:

2 Ikea Lack tables: 1 used = free, 1 new = $7.99

1 Ikea Bygel rail: $2.99

4 screws for the rail: 4 x .30 from True Value in the U-District = $1.20

Wood table top = Free from dear-ol’-dad

Grand total = $12.18, not bad for a functional microwave stand.

Have you done any ikea hacks to save space? Let me know in the comments below.

-Sarah